If you just published a website, the first thing to do is set up Google Search Console. Not a keyword tool and not an analytics dashboard: Search Console. It gives you data straight from the source, which is Google Search itself, and it is free.
I have been in this space for well over 16 years. I have managed small websites and enterprise websites with hundreds of millions of pages. This post is not for my colleagues in the industry. It is for the business owner who is a little frustrated and trying to learn the basics of managing their own website. If that is you, this is the walkthrough I wish every site owner got on launch day.
Prefer to watch? This is the full 10-minute walkthrough. Watch it on YouTube.
Key Takeaways
- Set it up on day one: Search Console is free and gives you data directly from Google, not estimates from third-party tools.
- Verification happens in your DNS: Add a TXT record at the place you bought your domain, then click Verify. Data starts showing up within a few days.
- Learn four reports first: Performance (clicks, impressions, average position), Queries and Pages, Sitemaps, and Page indexing.
- Indexing beats volume: Google is cleaning up its own index. Unique experience and perspective get pages indexed; mass-produced pages do not.
Table of Contents
Why Set Up Search Console First
Tools like Semrush and Ahrefs are useful, but they estimate how your website is performing in Google Search. Google Search Console is the tool that gives you the real data from the source. It can feel overwhelming at first, so I will walk through it one step at a time.
Step 1: Add Your Property
Step one is to add a property. When you do, Search Console asks what kind of property you want to add.
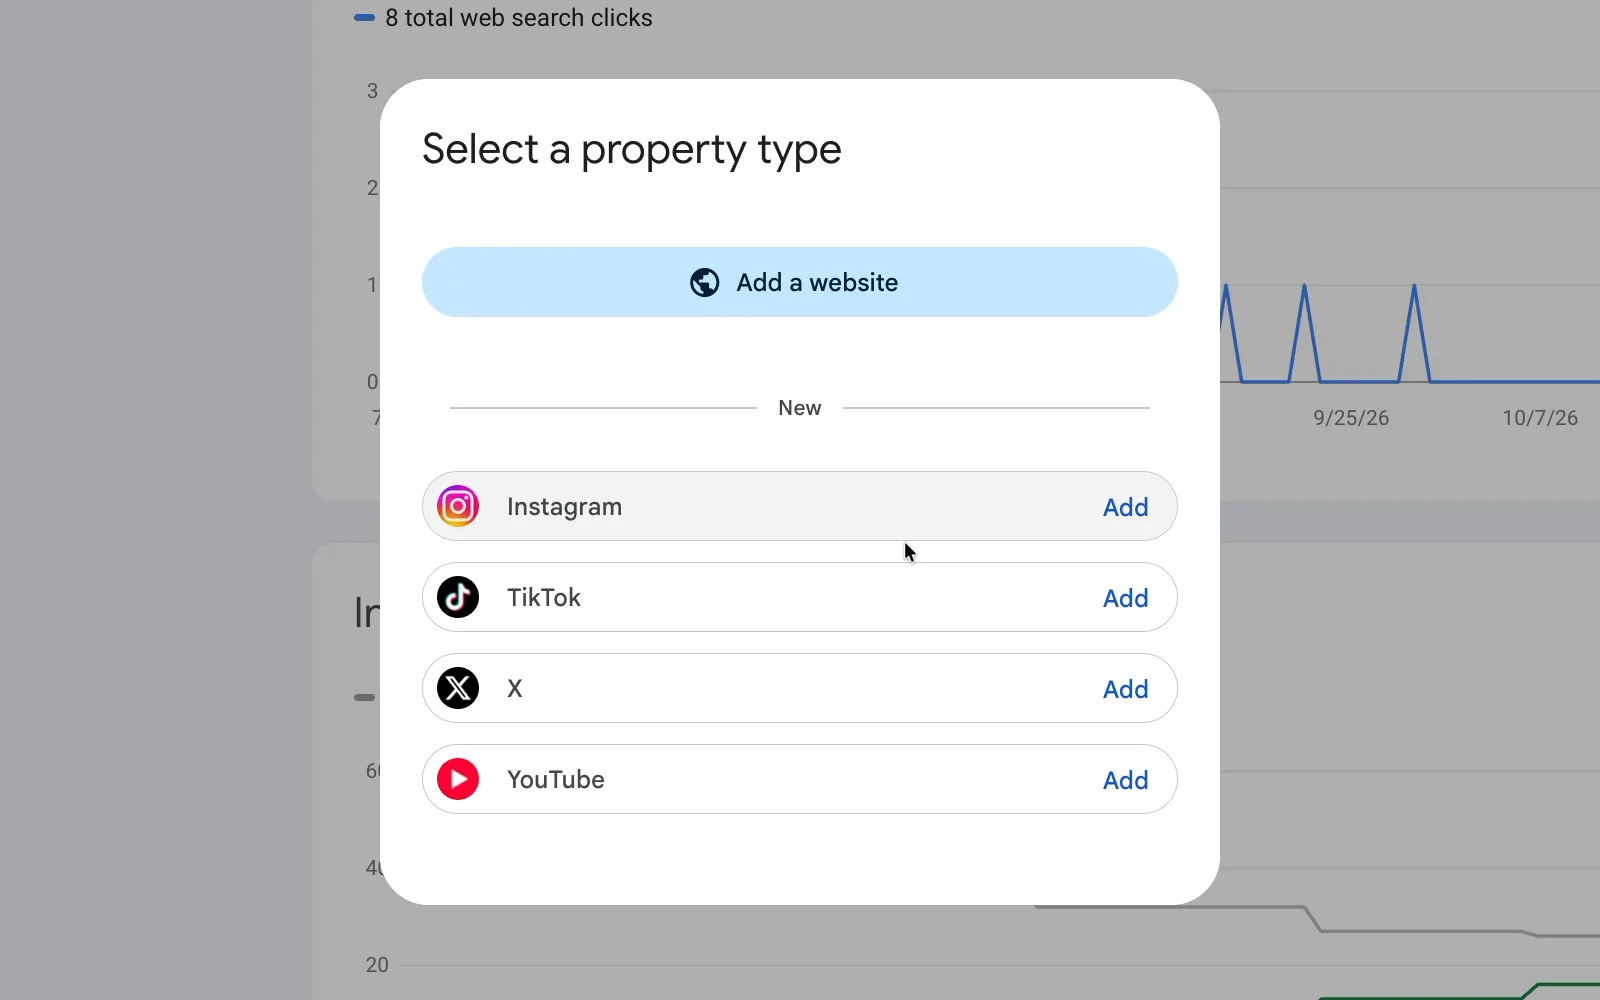
The social options at the bottom (Instagram, TikTok, X and YouTube) are new. Google now has search profiles: if you qualify, with enough subscribers and followers on those platforms, you can add them and measure that data too. For this post we are focused on websites, so add your domain.
Step 2: Verify With a DNS Record
Once you enter your domain, another window opens with instructions to add to your DNS record. If you are thinking, "I have no idea what a DNS record is," that is okay. DNS (the Domain Name System) is the internet's address book, and your DNS record lives wherever you bought the domain.
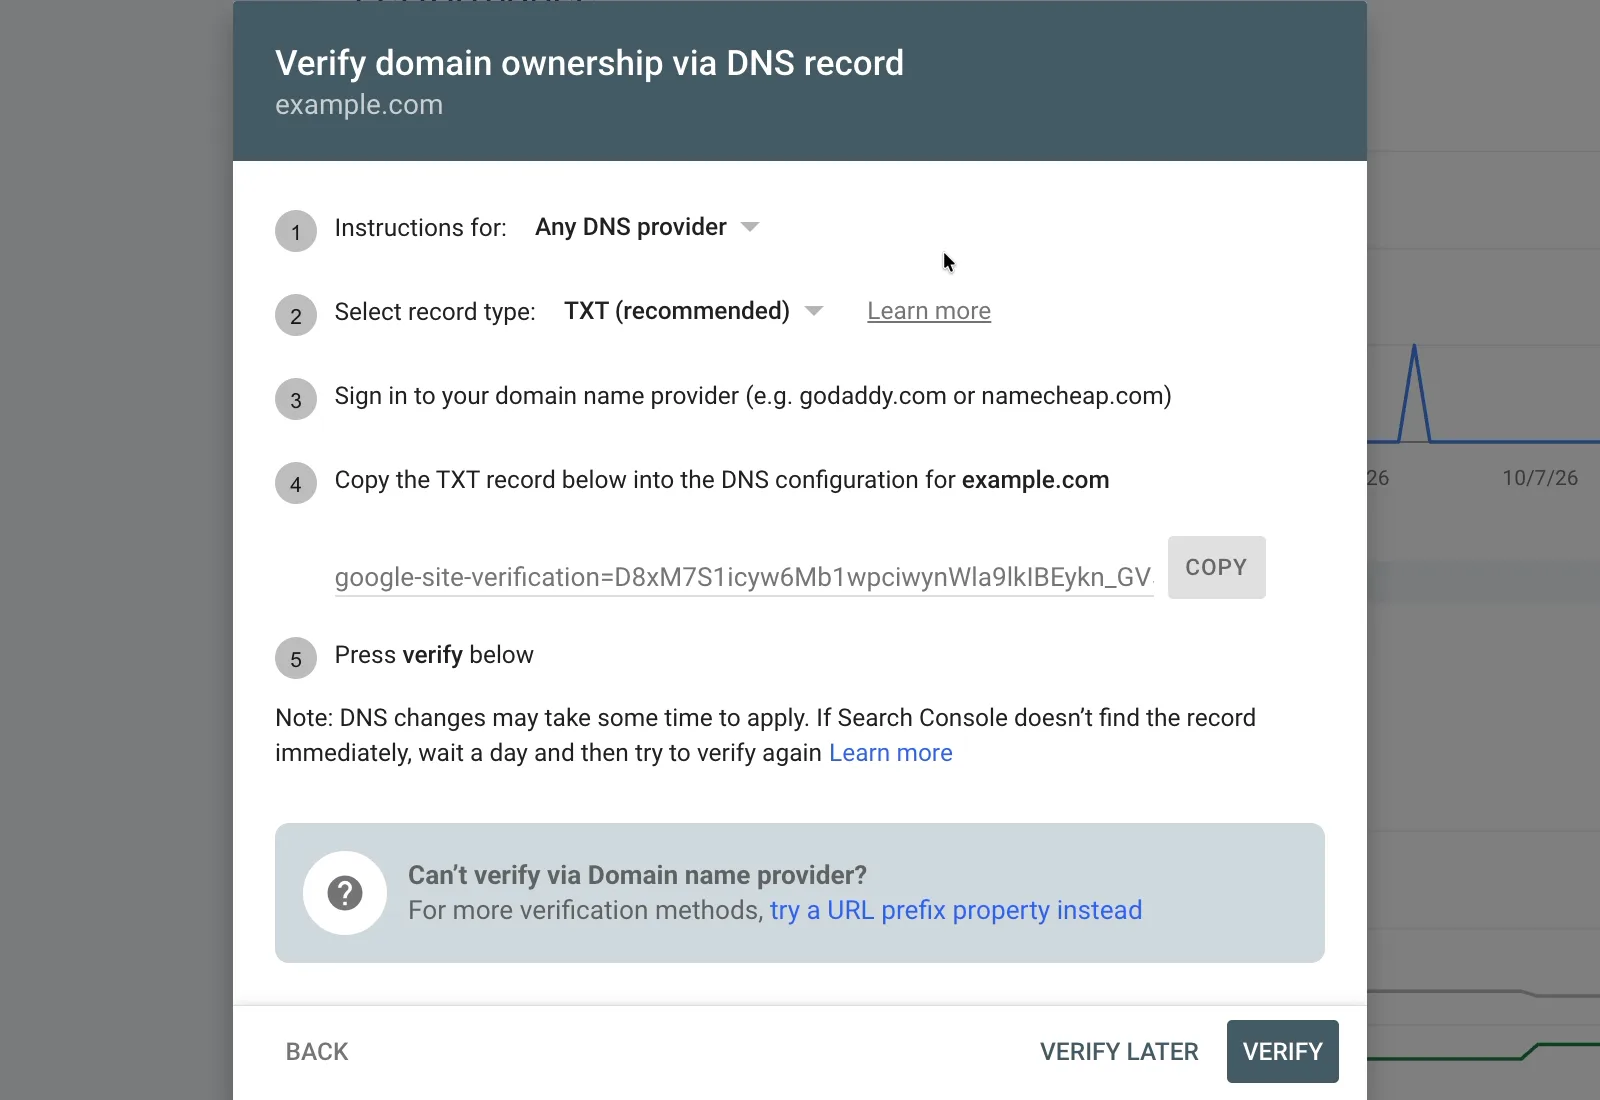
For a lot of people that is GoDaddy or Hostinger. There are many other providers too, such as Namecheap. Log in to your provider and open the DNS settings. Hostinger, for example, shows a table of fields. Copy the value from Search Console, add it as a TXT record, and then click Verify.
It can take a few minutes, so do not be surprised if verification does not work the first time. Give it a couple of minutes and verify again. Over the next couple of days, data will start to populate.
The Overview Tab
The Overview tab gives you a tile for Performance, a tile for Indexing, and an Experience section. Experience is mostly Core Web Vitals, which is Google's term for how fast and responsive your website is on mobile and desktop. There is also HTTPS, which most hosting takes care of for you nowadays. I will cover that in its own video another time.
The Performance Report
Performance is where most people spend the majority of their time. You can filter by 24 hours, 7 days, 28 days or 3 months, and it defaults to 3 months. You can also customize the range.
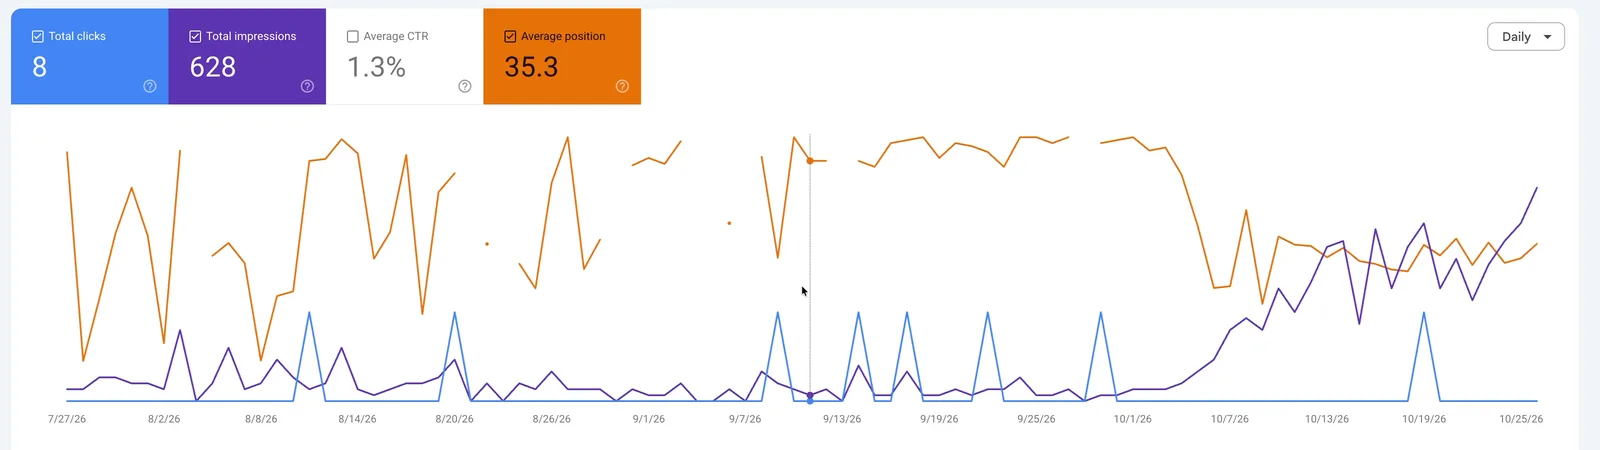
This report shows how your clicks, impressions and average position have changed over time. For a new website it is normal for not much to happen, and for what does happen to be sporadic. You have not published much content and have not built authority yet. Many of you will be in this stage. Take a deep breath: it gets better.
Below the chart you have tabs for queries, pages, countries, devices, search appearance and days.
Queries and Pages
Queries are the search terms people use in Google where your website shows up. On my new site that includes things like "AI marketing agency," "SEO for landscapers," and "pool cleaning SEO services." This gives you an idea of how Google is initially clustering your content.
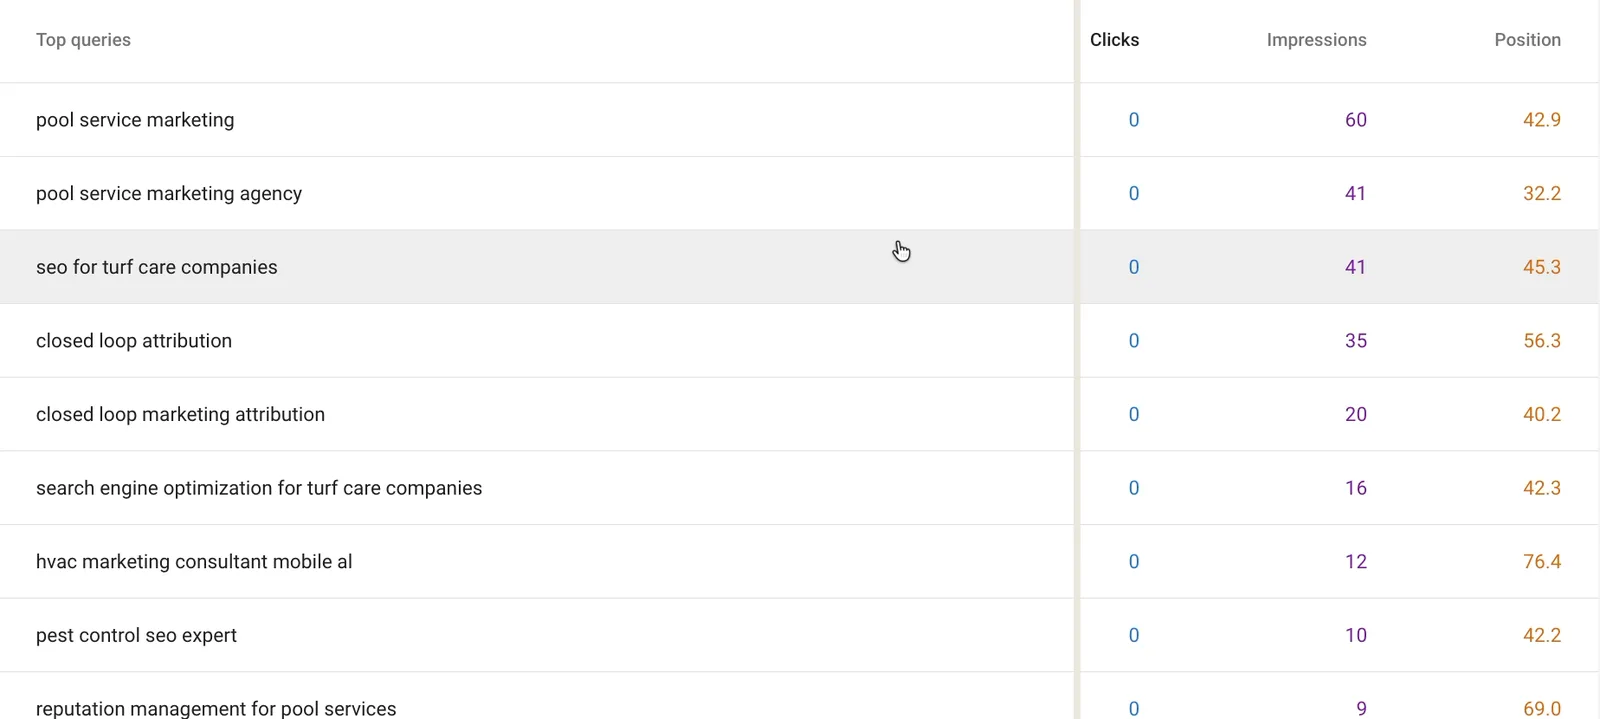
Click the average position box and it adds a position column to the table. On a new site those numbers will be double digits and big. That is okay, because you just started. The goal is to get them into the top 10, and top five is better. More importantly, this tells you what content to write about and what videos to make.
The Pages tab shows your individual pages, ranked by how they perform in Google Search, along with each page's position in the SERP (the search engine results page). Spend time here and get familiar with it.
Submit a Sitemap
Next, open the Indexing section in the left sidebar and go to Sitemaps. A lot of people starting out in web development and SEO forget this step, and it matters.
If you are on WordPress, a plugin can generate your sitemap. If you are building a static site, you will want to build an XML sitemap yourself. An XML sitemap is a machine-readable list of the pages that exist on your website, and you submit it to Google for crawling. It is a signal to Google: "this is what exists on our site, can you pay attention to these?" Google replies with a thank you for the queue and begins its crawl.
Indexing: Which Pages Google Kept
Open the Pages report to see what is indexed. The dropdown at the top is important. "All known pages" is every page Google has attributed to your website, whether or not it is in your sitemap. For this walkthrough I focus on "submitted pages," which shows the pages you submitted and how many of them are indexed.
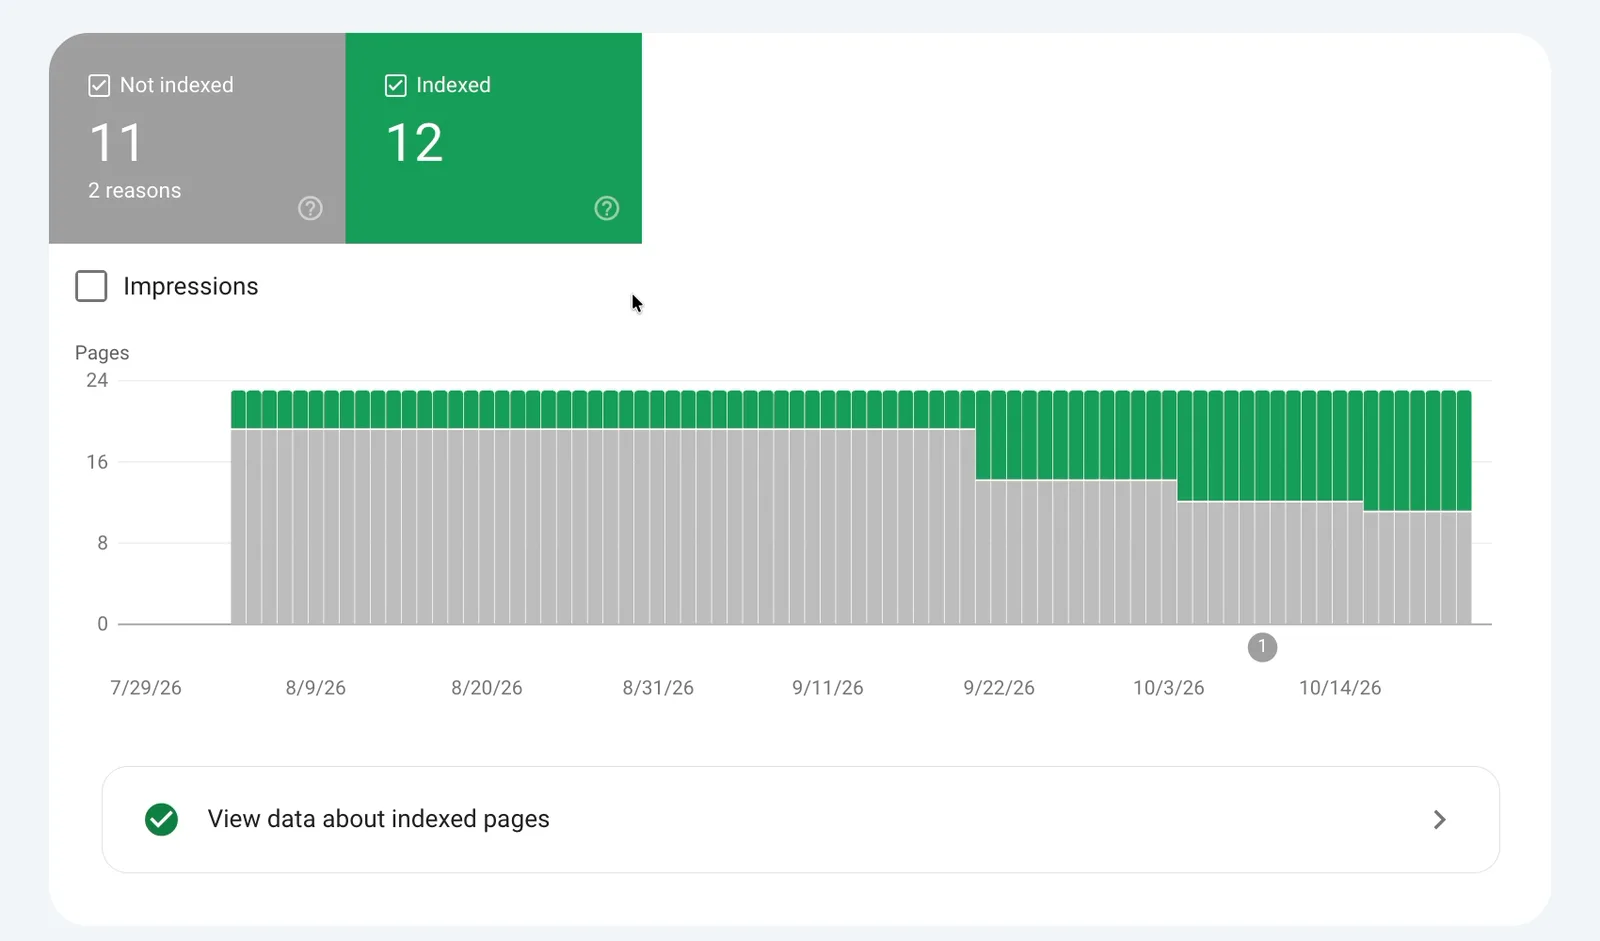
On my site that is 12 indexed pages, and the chart gets greener over time. As the website matures and Google crawls it more, more pages get indexed.
Why Pages Are Not Indexed
The next question is why other pages are not indexed. This can be frustrating for new SEOs, but there are ways to improve it over time. There are several reasons Google may not index a page, and I will not get too granular here. The one to look at first is "Discovered, currently not indexed." Often these are blog pages.
Inspect a URL and Request Indexing
Open one of those pages and Search Console shows the exact URL. Use the inspect tool to see what is going on. In this case it says discovered, not indexed: Google knows the page is part of the sitemap and sees the referring page, which is the blog page.
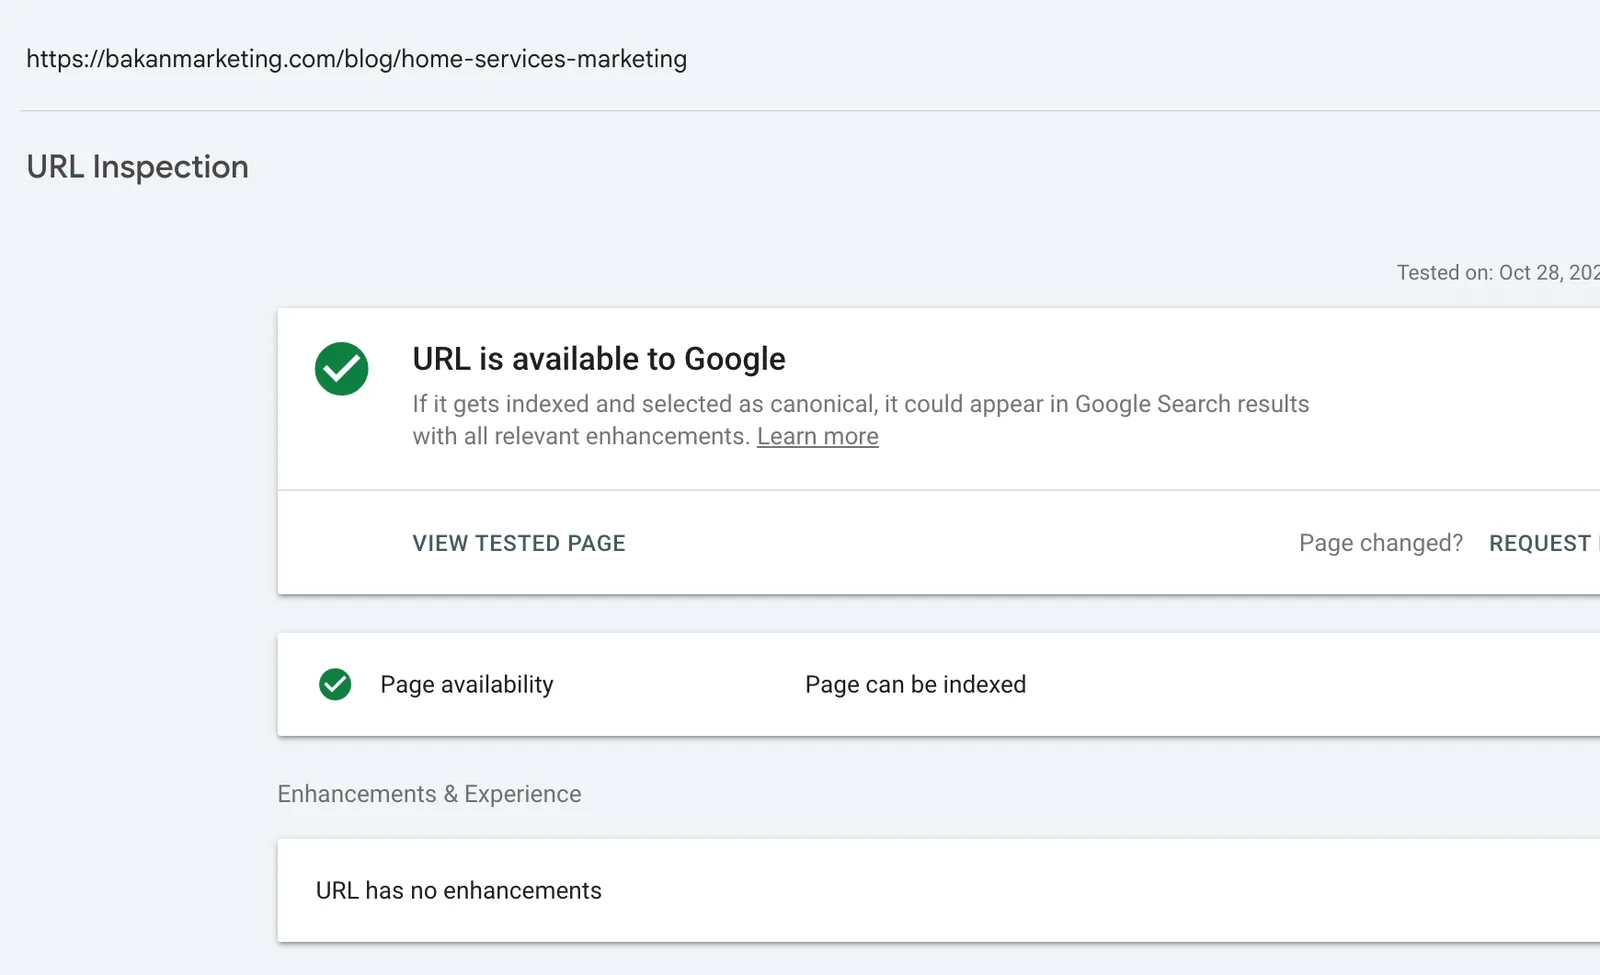
From here you can test the live URL to make sure the page renders its content properly, then view the tested page and a screenshot to confirm things look good. If they do, you can request indexing, which asks Google to look at the page again.
Be Unique, Not Just More
The problem a lot of people have is that Google has been focusing on cleaning up its own index. Many people use generative AI tools like ChatGPT and Claude to scale their content, publishing thousands of pages a month programmatically. Not all of it is unique, not all of it has a unique experience or an authoritative take, and not all of it adds value to the SERP.
Why would Google stuff its index with monotonous content that all looks the same? It is looking for unique perspectives and experiences. My advice as you build out your written content: lean into "I learned XYZ from this conference" instead of regurgitating other people's takes. Be unique, and you will see your indexation and your authority improve over time.
Core Web Vitals and Settings
Core Web Vitals will populate as you get more traffic, with data on how fast your pages load and render on mobile and desktop. As this site matures I will do a follow-up on it. The Settings area is also worth a look: the crawl stats show how many crawl requests happened over a period, broken down by file type (how much is HTML versus other things) and by response, including how many 400 errors are happening.
Recap
- Data to decide what to do next. Many site owners are missing the data to make informed decisions about where to take their website.
- It is free and quick to install. Verify through your DNS provider and you can have data within about three days.
- Then learn the tabs. Performance, Indexing, Experience and Settings.
Search Console is underutilized, and in my opinion it is one of those no-brainer tools you should set up the day you publish your website. If this helped, let me know in the comments how I can make these better, and subscribe on YouTube for the next ones in this series.